Remove Pen Cap
0:00 - 16:25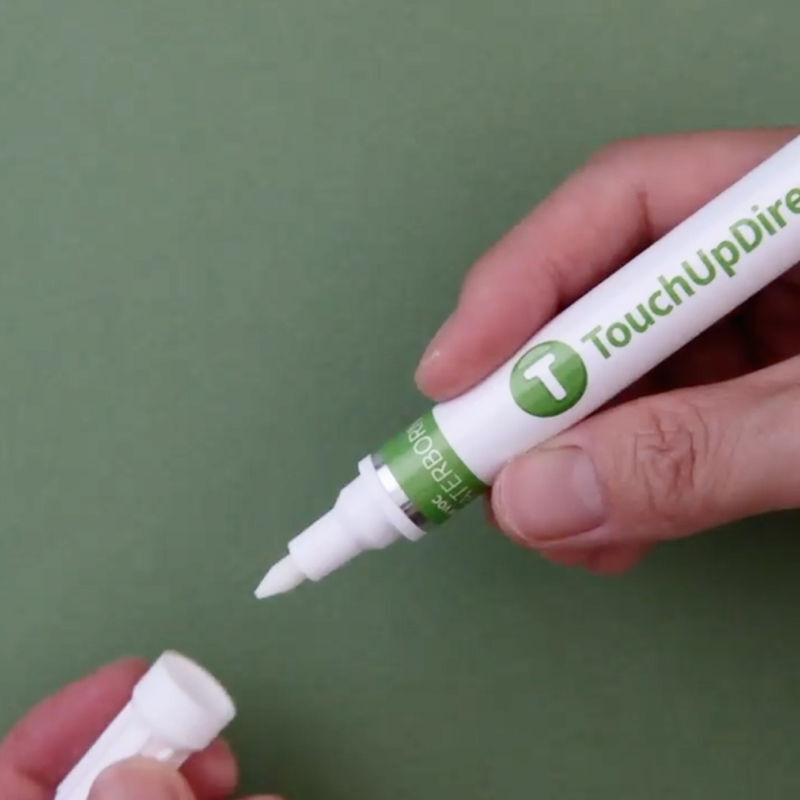
- Shake the pen well.
- Remove the cap from the pen.


Step-by-step guide to get your new touch-up pen ready and the paint flowing to the tip.
Hi i'm yuri from touch up direct today i'm going to talk to you about tesla touch-up paint we get a lot of requests here at touch-up direct about tesla colors people ask if the paint is unique the colors are unique the colors are the paint and the touch-up procedure is not unique it's like any other car teslas do tend to live in the city where it's it's very difficult on cars there's a lot of wheel rash nicks scratches on the bumpers on the doors so we're going to show you how to do it here's the 2012 tesla model s in monterey blue that we're going to be working on it's got some damage on the front bumper the rear bumper and also the door we're going to fix all those scratches remember before you do your touch-up it's good to test the color and check that you purchased the right color every one of our touch-up paint packages includes a test card in this case we did this little square of the monterey blue for the tesla and it looks like a good match this way we know we're not applying the wrong color if you make a mistake while doing your touch-up don't panic it's not the end of the world it can be removed and you can begin again you can contact us and we're always here to help guide you we have a small stone chip here that we're going to use the touch-up brush for it's always good to wash your car before you do this first step will be to take a wax and grease remover go one direction over the scratch so that you do not wipe wax or grease back over the spot and let that dry so now we're going to do our first coat of primer with this particular chip any time you're down to a bare substrate such as plastic aluminum steel you need to use primer try to keep all the paint primer in this case within the confines of the scratch do one coat let it dry in this case i added two coats of primer letting it dry about 30 minutes or so in between to achieve a real oem quality finish you have to let the paint dry do not rush it you have to use the primer the clear and the color we'll be adding the color next okay we're going to add our first coat of color this is for the monterey blue model s as we apply the color it's going to look different than the rest of the color on the car this is a treat of waterborne paint it's nothing to be concerned with as it dries the color will come in we've added three coats of color this created a proper color match and good coverage of the repair letting it dry about 30 minutes or so in between to achieve a real oem quality finish you have to let the paint dry do not rush it now i'm going to add clear coat there'll be a total of two to three coats of clear use the exact same procedure and cover it let that dry about 10-15 minutes and add another two coats okay i'm adding the final coat of clear this is my third coat once this is applied you let it dry for at least 24 to 48 hours and you can then polish or wax this as any other paint on the car for this project we used a touch-up brush of primer the touch-up brush of color coat and a touch-up brush of clear coat as well as a wax and grease remover now we're going to focus on this damage on the rear bumper there's a few things going on here this top one is the most concerning when i rub my finger on it i can feel a little bit of a divot we're going to use the touch up direct spot putty on this that will fill this hole we'll sand it smooth and then we'll touch up that and these also these surrounding scratches the first step because we're going to be sanding is to tape this off in a way that makes it so we don't damage any of the original finish when we're doing the sanding this first procedure this taping is really just for the putty so that we minimize the potential for sanding scratches doesn't need to be perfect you don't have to tape out exactly around this hole what we're gonna do is take four to five hundred grit sandpaper and smooth this out ever so slightly this will help the putty adhere to the scratch doesn't need to be perfectly smooth you don't have to go crazy here the putty itself will make it so that it smooth out the the divot okay we're gonna clean this out a little bit with the wax and grease wipe just to make sure we don't have anything in there after it's been sanded now i'm going to take the touch up direct putty we sell this very handy little size and just apply some on there don't worry about it looking pretty just get it on there fill that that divot smooth it out as best you can and you'll be able to see how it's filling that divot in there obviously don't worry about if it gets on the tape it doesn't matter what we're going to do is we're going to let that dry then we're going to sand it lightly before we remove the tape okay now that the putty is dried i'm going to take 500 sandpaper i'm using wet sanding the wet sanding technique maybe makes a little bit smoother but it can be dry sanded as well but the goal here is to smooth out this area where the putty is and remove the excess putty it will slowly sand down until it's gone after we sanded the putty smooth we're going to remove the tape because the tape makes it hard to sand it completely smooth now we're going to continue wet sanding i'm going to move to 1500 grit sandpaper because i want to not damage the the area around the putty area this is a matter of taking wet or dry sandpaper which is what we have here dipping it in a cup of water and just lightly sanding you'll see the putty start to slowly disappear the hard corners of the putty and all that'll be left is where we want it to be in the actual damaged area in this case because of the sanding it did scuff up the paint around the damaged area a little bit but we'll be able to polish that out a little bit later on in the process after we put the paint on the actual scratch also going to slightly smooth out this other scratch because it's it's kind of rough so we're just going to sand that down a little bit again same technique with the sandpaper okay now that we've done the putty the scratch is nice and smooth there's very little feel of the divot that was there it was pretty deep the putty fills that in but because we use a putty now we have to apply some primer so in this case i'm only going to use the primer on the areas where the putty was we'll do a couple coats of that maybe smooth it out with the with some wet sanding and apply the color okay now we've applied primer i'm going to go back to wet sanding again just dipping my sandpaper into this cup of water it can be any type of cup doesn't matter wet or dry sandpaper and i switched to 2000 because i want to really go easy on this and i want to just focus on the areas where there's primer and i'm just trying to knock the edges off make it nice and smooth don't want to go outside of the lines too much outside of where the primer is otherwise it will it'll scuff the paint on the car even though with 2000 you can bring the finish back it's not a big danger still we want to be very careful and you can see what's going on here the primer is getting smoother that divot now is completely filled in and we have a little scuffing around the edge here but that'll all come out with our polishing compound okay the primer is dry the putty's dry we're in good shape with all this if you see a little bit of sand marks on the outside of the scratch don't panic it's just that the 1500 sandpaper you can get the gloss back with the polishing compound and you can even see where it's wet how it's doing that and we are ready to add color now we have multiple scratches here as we mentioned earlier i'm just going to focus on getting the color onto everything that's primered i'm using the brush again because it's a little bit of a larger spot if it was any smaller than this i would use the touch-up pen waterborne paint always looks like a different color on the first coat as long as you verified your color code and checked your color before you applied it you're fine it dries much different okay first coat we're gonna let that dry and come back to it and add another two or three coats okay with waterborne paint it's important to remember that if you goof up a little bit it's no big deal and you want to sand it a little bit you can do that but you cannot wet sand it it's going to completely remove it because it's based in water so in this case i just want to smooth this out a little bit and after i do that i'm simply going to add another coat of color it doesn't hurt anything it is the the proper procedure then you're right back where you started from two or three coats of color let it dry and then you're ready for the clear coat okay we've applied three coats of the color another important thing to remember with waterborne paint is it does not dry glossy so if you're looking at the scratch after you've applied the color and it looks matte it's because it is the gloss comes with the clear coat again do not worry about the white sanding marks around the edge of the scratch that's all going to be removed with the polishing compound we're going to let this dry add a couple coats and then polish it okay the clear coat's dried for 24 hours i'm going to take our polishing compound and just slightly work this the area this will also smooth out any bumps or imperfections in the clear coat but really the goal here is to get rid of that haze that the sanding haze that was around where we applied the putty you do want to make sure it's good and dry waiting 24 hours so that the the clear coat is dried and hardened and you can work this as long as you like until it's to your satisfaction in this case i still got a little bit of haze there so i'm going to continue with you can use the compound very liberally too the more you use the more grit there's there and the more it'll smooth things out after it's been thoroughly polished you can wipe it down and you can wax this scratch at this point and you're good to go for this project we used the tape assorted sandpaper for wet and dry sanding the cup of water was for wet sanding then we used the touch-up brush of primer touch-up brush of color touch-up brush of clear coat we used the waxing grease remover to clean the area before applying paint we use the polishing compound and we use the putty to fill in the little divot okay for this kind of scratch what we're looking at here we're going to try to polish some of it out first there could be a lot of paint transfer from whatever made contact here so the polishing compound will likely remove a lot of these scratches i can see that it's still going to take some touch up to to clean this up but i think that we can make it look much better with the polishing compound first and then only touch up what really needs to be touched up in this area i can hear that it's it is pretty well scratched up so we'll be doing some touch up there what i'm seeing here is there's definitely a scratch right here that's going to need some touch up maybe a little one right here but most of that came off from the polishing compound you can see the the difference it was a lot of white paint transfer we're just going to touch up this small scratch and this small scratch there's some light scuffing here that touch-up will really not work on but you can continue to polish this with the polishing compound and they may come out even better yet gonna go with the wax and grease wipe again especially after using the compound we want to make sure we don't have any residual wipe one direction off those two little scratches and we're going to let that dry and in this case we are not down to plastic there's still primer there so we are just going to add color and then clear coat i'm going to use the touch-up pen in this case because it's a very small nick we get a lot of requests of people asking how to use the touch-up pen and how to prime the tip it's very simple take a soft cloth not on the car or anything hard something soft so that it doesn't damage the tip and push it in the paint will start to flow down the tip takes a few pumps maybe it takes a minute or so for the paint to thoroughly saturate the tip you can see how it flows down and it starts to saturate and this one's just about ready paint's flowing down did you see it transferring to the cloth it'll continue to flow for a moment too even after you stop pushing in this one is ready to go just using the very edge of the touch-up pen allows you to really add a minimal amount of paint we're going to let that dry and then do the two to three coats like we've done with all the others okay we've added color now we're going to apply the clear coat two to three coats 15 minutes or so in between in this case because i'm using the combo applicator i also have a brush available and i wanted to apply a little bit more clear coat than was easy with the pen so i'm just going to use the brush makes it very simple after that dries you're ready to go it can be polished and waxed in 24 to 48 hours for this project we use the combo applicator of primer color and clear coat as well as the wax and grease remover and the polishing compound okay in this case we've got probably 25 30 very small stone chips of some sort they're they're very small nicks we've already used the wax and grease remover on it to clean them up just going to take the touch-up pen side of the combo applicator and touch all these up not going to go too crazy on this one because they're very small no need for primer some of them may even cover in one one coat and if they do we'll just put the clear over it okay we're going to give that 10-15 minutes to dry and then we'll assess and see if it needs another coat we're ready for our next coat i'm going to take this soft talon and get a little bit more paint on the tip of the pen side here it's always good to have it primed before you begin applying for this job this is going to be the last coat because we don't want to get too much paint on here then it'll it'll get lumpy we're going to let this dry and then we'll do the clear coat okay we have good coverage with the color now we're going to apply a coat of clear and we'll let that dry see if it needs another coat okay final coat of clear being applied just let that dry then in 24 hours or so you can polish or wax it for this project we used a touch-up pen of the color and a touch-up pen of the clear as well as the waxing grease remover and polishing compound.